AA Skincare Rose and Frankinscence Toner

Hey girls, sorry for the delay on posting this! I probably will not be posting as frequently from now on however I will still try to fit in time to blog. If you read my 10 Tips for Clearer Skin post, you’ll know how important it is for me to have a toner as part of my skincare routine every night and I have fallen in love with this toner I was sent from AA Skincare. This just launched in July and is definitely one of my favourites from them so let’s get into why..

I love both rose water and toners so them both combined for me is everything I could want! I love love love the packaging – it’s a clear bottle with a pink logo and writing (so pretty!). It’s such a sturdy lightweight 150ml bottle and comes with a spray top which is perfect too so I’ll be definitely taking this on holiday with me.

This toner is 100% natural and you guys know how obsessed I am with finding all natural and vegan-friendly products, and this toner also contains vitamins, anti-inflammatory ingredients and anti-oxidants.


I’ve used this everyday since I received it – it calms my skin down as well as leaving it soft to the touch and super clean. Even when I think the last of my makeup has been taken off, i spray some of the toner onto a cotton pad, wipe it across my face and still be surprised at how much is left on my face. I also love to spray this when I need to cool down for a quick refresh and it’s the best, I’m so happy I had the chance to try this toner as I’ve fallen in love with it. You can purchase a 150ml bottle from AA Skincare for £7.95.

Thank you to AA Skincare for this product and I hope you guys liked this post.

I’ll see you here again soon! x

Review: AA Skincare Cleansing Wipes

Hi beauties, I hope you’re all enjoying your summer! When I was asked to review AA Skincare’s all natural cleansing wipes, I jumped at the chance not only because I love AA’s products but I also wanted to pitch something in to the whole wipes vs cleansing balms debate. Many people seem to hate wipes for removing their makeup however these Green Tea & Aloe Vera cleansing wipes are all I’ve been using to remove my makeup lately and they’re a dream! I was also sent the Tea Tree and Aloe Vera wipes which can be used for a quick freshen up head to toe.

Processed with VSCO with kk2 preset
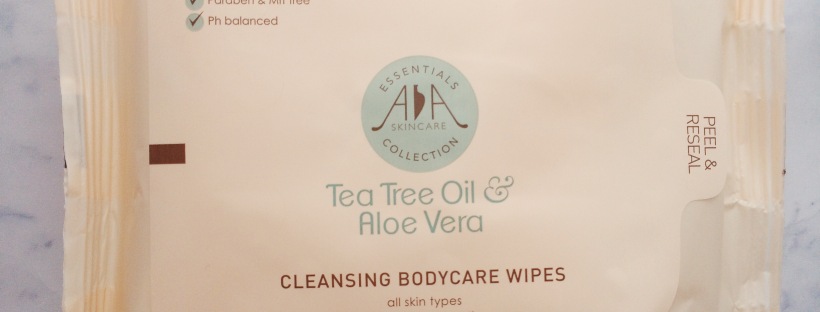
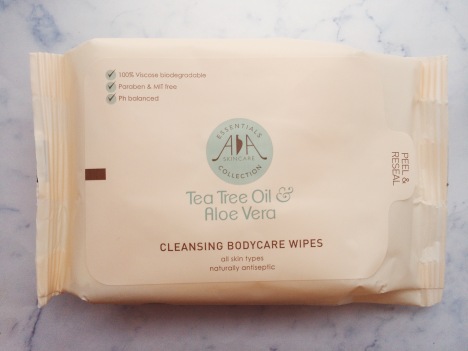
Although I don’t necessarily use the tea tree wipes everyday, I do like to use them to freshen up my skin from time to time as well as removing my makeup. They do have quite a strong scent however it fades after a while and leaves my skin super soft, cool and calm. They’ve also been helping to keep my skin clear due to the tea tree oil in them which naturally cleanses and removes bacteria. I’ll definitely be taking these on holiday with me to help keep my skin cool and you can use these from head-to-toe whether it be for travel, after the gym or even now that festival season is approaching, these would be perfect to have on hand!

Processed with VSCO with kk2 presetI have been also been loving the Green Tea & Aloe Vera wipes too – they really do cleanse my skin and remove all of my makeup so I don’t have to worry about going to sleep with makeup still stuck in my pores (which is the last thing you want to do!). They don’t leave my skin wet or sticky but really soft, nourished and clean. I was debating on whether I should completely give up on cleansing wipes but these have really changed my mind and I realised how much i love them when i end up reaching for them every night.

IMG_4429.JPG

They’re suitable for all skin types which is fab and you get 25 wipes for £3.30 (they’re currently on sale for £2.64!). They’re also all natural with essential oils and are paraben, alcohol and artificial fragrance free – how perfect is that?! My sensitive skin loves these wipes and I will definitely be purchasing another pack once I’ve finally finished all of these in a couple of months.

You can purchase them here – I highly recommend trying these wipes and I’d love to know if you guys have tried these or any other AA products? Let me know and i’ll see you guys here again soon!

Much love,

Zahra xxx

Twitter / Instagram / Contact


DIY Setting Spray!

Hey lovely, after talking about how I make my own setting spray on Twitter a few weekends ago, I was asked to write a blog post on it by a few girls and I was more than happy to! I spoke about the Nivea Post Shave Balm as a primer back in my March Favourites post and although I don’t mind applying it by hand, it just seems to take up five minutes in a morning which I don’t have.

So after seeing a genius comment on a NikkieTutorials video about how you can turn it into a setting spray, I had to try it and I’ve never gone back! Here’s how you can make your very own setting spray to get your makeup to last for just under a fiver. I love this idea because I know it won’t contain any harsh chemicals unlike other setting sprays, I know exactly what’s going into it and it works perfectly due to the main ingredient being glycerin. So let’s get into it.. Enjoy! x

Processed with VSCO with hb1 preset

What you’ll need is the Nivea Post Shave Balm and an empty spray bottle. You can pick up the balm from your local supermarket or drugstore for around £3 -£4 at cheapest and an empty spray bottle costs around £1. (Please don’t use one which previously contained anything chemical such as a cleaning product or anything you’re unsure of, better to be safe than sorry since this will be going on your face!)

Processed with VSCO with hb1 preset

I mix two parts of the balm with one part water however you will have to see what works for you when mixing it together as it’ll have to be thin enough to spray, yet have enough balm in the mix to actually work!

Processed with VSCO with hb1 preset

You may end up having to add more water if the consistency becomes too thick, or more balm if you feel it’s become too watered down.

Processed with VSCO with hb1 preset

You can then pour your mix into your empty spray bottle, check to see if it sprays (add more water if not/more balm if it’s too thin) and voila, you’ve made your own setting spray! For me, this keeps my makeup on from around 8am to 4pm without it sliding around my face which is good enough for me and even then it’ll still be in place, it’ll just need topping up with a little powder under my eyes since my concealer NEVER stays put, cry cry.

Processed with VSCO with hb1 preset

And that is literally it! It’s so simple and due to the amount of balm you get, I’ve managed to make three bottles of this as well as used it as primer for months beforehand and still have product left. I hope you guys enjoyed this post and would love to know what you think!

Much love,

Zahra xxx

Twitter / Instagram / Contact

Summer Must Haves: Contoured and Glowing Bronzed Look

Hola my beauties, guess who’s finally done with exams?! I’m not going to lie, it feels kind of bitter-sweet because I really don’t want to leave sixth form but no more revision means more blogging! Actually more like blogging instead of revising without feeling guilty 

Even though England is cloudy 90% of the time, I am so excited for summer and to be able to play around with makeup to give me that sun-kissed look which will make me look so glowy you’ll be able to see me from outer space 😉 I’ve decided to start this new segment of Summer Must Have makeup products and I’ll be starting with contouring and bronzing so enough jibber jabber, let’s get into it!

I was very kindly sent a couple of products from Seventeen which I’ve been so excited to share with you guys just because of how much I’ve fallen in love with them. I would have written a review straight away however i wanted to use them for a while and form my opinions on how well they actually perform. I’ve been using both of these products with a few Makeup Revolution and Sleek products every morning for the past few weeks and I honestly don’t know how i did my makeup before i had them!

Cks-bATXIAQwKZ6Seventeen’s Define & Conquer Contour Kit (can we please talk about how badass that name is?! I love it) reminded me of an Elf one I’ve seen floating around on Twitter and was excited to see how well the shades played on my medium skin tone. The packaging is perfect for if you want to take this on the go with you as it’s sturdy, light and comes with a mirror inside. It also comes with a guide on how to contour and highlight which I think is really smart of Seventeen as it’s really helpful, not to mention the name makes me feel like I can take over the world when i see it every morning!Cks-a8uXEAADKeT


Both of the shades are matte powders – one is a highlighter which in my opinion is the perfect highlighting shade for a range of skin tones due to its undertones as it isn’t too white and the second is a contouring powder. I was pleasantly surprised at the warmth of the contouring shade when I applied it and use it as a bronzer too as it’s the perfect shade for giving you that sun-kissed warmed up looked in the summer as well as giving you chiseled cheekbones. The contouring shade isn’t too grey nor too orange and I think Seventeen got this one spot on because I am honestly so obsessed with it

Both powders are fairly pigmented however on my olive-toned skin, the contouring shade I am in love with shows up a lot more compared to the highlighting shade. This product retails for £5.99 which i think is an amazing price as i see this palette lasting me for quite a while yet.

Cks-bFkWEAATBeJ

Cks-bDKWsAArOki
The second product I cannot rave enough about right now is the Seventeen Instant Glow Cream Bronzer – you guys I am in looove with this! I swear, I now understand why people love bronzers so much and if you know me by now, you know i love a good glow. (There’s no such thing as glowing too much!) It “contours cheekbones and décolletage for definition and colour” and i use this product for exactly both those things.

I was really confused as to how this would make me glow though as it seemed quite matte however there are tiny shimmer particles in it if you look really closely so that when you blend it onto your skin, it all blends in so nicely to give you that natural bronzey glow instead of just looking like a glitter ball since that’s what highlighters are for eyyy.

This product is so creamy and soft compared to other cream drugstore products I own which can be quite stiff and I just adore how it blends and feels when i apply it, i swear it’s a dream. I use my contour brush to apply this to my cheekbones and temples before blending it in with my sponge. It definitely gives me the bronzey colour I need considering the lack of sun right now and although the pigmentation isn’t extreme with one touch, you can definitely build this up until you’re happy with it! It retails for £4.99.

So that’s it from me, I hope you guys loved this post and thank you so much to Seventeen and Louise for these products. All opinions stated are my own and this post is not sponsored in any way.

Let me know what your favourite contouring and bronzer products for summer or just in general are down below or on Twitter. I’m thinking my next post on this segment should be highlighters? Or blushes… Maybe i’ll make a poll on Twitter so you guys can let me know what you want to see next, your wish is my command lovelies!

Much love,

Zahra xxx

Twitter / Instagram Contact

10 tips for clearer skin! 

Hey beauties! So after many questions from friends and bloggers regarding skincare, I decided that this topic for a blog post would be perfect.

In November, I broke out worse than ever and started a 12 week course with the help of my doctor on treating it. So whilst hating my skin and not wanting anyone to see me in harsh lighting, I decided to try to find out what was causing my acne and how I could get rid of it for the most part.

After a loooot of reading on the internet, I’ve figured out what causes my spots, how i can control them and best of all, not completely stress and cry if my skin throws a tantrum. Ever since I haven’t been able to go about my beauty routine without my skincare products whilst constantly trying out new ones. I am finally happy with how clear my skin looks and it feels amazing, so I decided to share everything I’ve learnt with you dolls on how to get clearer skin and avoid acne as much as we can! Enjoy x

You guys will also be seeing something very exciting soon so make sure to subscribe and follow so you can be the first to read about it!

Quick point: Acne can be due to clogged up pores, not enough oil/too much oil being produced, hormones or even how well our internal organs are working so always try to work out what’s causing your acne before jumping into treating it!

Tip #1: Befriend Salicylic acid

That may sound terrifying, but let’s start with what it is and what it does. Salicylic acid is used to treat acne, it targets the acne within your pores and skin cells whilst removing dead skin cells on the surface. Due to it being anti-inflammatory, it also reduces redness. You’ll find this ingredient in spot treatments (if it’s one worth buying) and the percentage you use really depends on the severity of your acne and blemishes. Percentages can range from around 0.5% to 2% and all of these are available over the counter however i’d recommend using this when it’s in a product.

I’m currently using the Neutrogena face wash cleanser which contains 2% Salicylic acid and has helped to keep my face pretty much spot free apart from the odd tiny blemish, however would probably be more effective in a leave on product such as a toner or moisturiser if you’re still treating acne as long as it’s not too harsh on the skin, but it does keep away and help get rid of giant spots (i swear, my face just used to brew mountains.)

Whereas Salicylic acid is particularly good for treating blackheads and pimples, Benzoyl acid is more commonly used to treat whiteheads to kill the bacteria within the pore however it can bleach clothing and percentages go up to 10% so be careful when choosing the percentage for your skin.

Tip #2: Cleanse your face after a shower

So since I’m quite lazy when it comes to washing my face, I would always cleanse or exfoliate whilst in the shower, ya know, since the waters already running and all. However, i never knew which order to do things, I was always questioning whether i should exfoliate before shampooing or cleansing after conditioning until one day I came across an article which made things as clear as a sunny day.

Now if you didn’t already know, acne along your hairline and forehead where my problem area was can be due to oil clogging up the skin and so washing grease away from the hairline regularly became essential. However, when you’re washing your hair, the shampoo and conditioner is most likely running down your face when you’re washing it away and at least touching it once and can get into your pores and clog them up even more leading to spots and blemishes.

Therefore cleansing after shampooing gets rid of all of that stuff we don’t want on our face, unclogging our pores making it less likely to get spots. And if you exfoliate, it’s definitely recommended to do it after cleansing since you don’t want to be massaging all of that bacteria back into your skin. Which cleansers and exfoliators are the best for keeping skin clear? I’ll get into that now…

Tip #3: Exfoliate – Microbeads and Microdermabrasion

Exfoliating and microdermabrasion both aim to get rid of the dead skin cells on the surface of your skin leaving you with a fresh, clean face. Microdermabrasion is a treatment done using tiny exfoliating crystals and is quite often a lot more expensive than an exfoliating scrub from the drugstore. If you have acne-prone skin, exfoliating twice a week with an oil-free exfoliator can definitely help clear up your skin and even if you have pretty much blemish-free skin, exfoliating once a week is definitely ideal to get rid of any flaky dead skin left on your face to give yourself smoother skin

Of course, you don’t want to be too harsh or abrasive when exfoliating as it can just irritate your skin more nor do you want to be scrubbing at your face too often so twice a week is more than enough, and you also want the microbeads in your exfoliator to really be as small as possible (think as small as grains of sand). If you use a brush, make sure to go in with a light hand and not press onto the skin but just gently work it along your face in circles.

For the past year, i have been using the Clean and Clear Oil-Free Exfoliating wash once a week and it leaves my skin so smooth!

Tip #4: Use comodogenic makeup and avoid harsh ingredients

When your skin is already clogged up, makeup can make it even worse however when you have a spot, all you want to do is cover it up. Since the majority of makeup products contain ingredients which are aren’t exactly pleasant or nice to your skin, this ends up being a terrible idea. Thankfully there are foundations and makeup products out there which are non-comodogenic and don’t contain oil so therefore won’t make your skin any worse (Maybelline, I love you). Also avoid using setting sprays for example which contain extremely harsh chemicals, and opt for ones which are less harsh, or even making your own is super easy! (Comment down below if you’d like to know how I made my own :-))

Tip #5: Toner

Many people completely don’t bother with toners or don’t see the point in them but for me it’s a staple in my skincare routine. Toners get rid of any dirt left on your face and depending on the ingredients can keep your skin looking youthful, amazing and best of all clear. Whether you wear makeup or not, you’re bound to be putting unnecessary dirt on your face whether it’s from your hands or even when you’re holding your phone up to your ear and it touches your face, and toners get rid of any traces of it left on your skin.

Even after cleansing twice, I still found some makeup or cleanser on the cotton pad which I’d dabbed with toner and ran across my face. I really believe everyone should have a toner, they make a difference! Rose water toners are amazing, as well as those with salicylic acid for clearing up skin or any of the good stuff I’ll get on to talking about now…

Tip #6: Vitamin A, Vitamin E, Vitamin C

Of course it’s good for you to ingest vitamins for our health but applying them directly to the face on your target areas works wonders too.

Vitamin A has been proven to reduce wrinkles and fine lines, help fade any dark spots and give you smoother, younger looking skin. You can find them in lotions, night creams or for a stronger dosage you can find it in prescription over the counter products.

Vitamin C is also amazing for anyone who is fighting the signs of aging by helping to firm and smooth your skins texture and can also help fade dark spots. For me, this has helped lighten my scars and helped balance out my skin tone

Vitamin E is amazing for restoring your skins natural moisture. It is also best for anyone who’s suffering from sunburn or serious sun exposure and should be applied before and after just like a sunblock to help protect your skin helping to reduce damage, so we can enjoy the sun all we want!

Tip #7: Essential oils we should all be using

This is definitely one of my favorite tips because i have recently fallen in love with oils and i put my clear skin down to the facial oils i use religiously every day and night now. Now for someone whose acne was caused by clogged up oils, the idea of putting extra oil on my skin made me cringe (I’m still a little terrified of putting it on my forehead in case i break out severely again) however after doing my research, i found that the answer to all of my problems whether it was dehydration, acne or acne scars, was oils! I’ll list my favourite couple of oils that are definitely amazing and i recommend to all of you to try at least one! (or carry on reading to find out how you can get them for a fraction of the price of one 😉

Rosehip Oil – This beauty has been on my wishlist foreverrrr but I just couldn’t bear the idea of paying £16 for an oil, however i definitely see this worth the money. It is full of vitamins such as Vitamin A, B, C and E and antioxidants which help fade dark spots, stretch marks or burns, reduce scars, itchy skin, fine lines (my laughter lines definitely aren’t as visible anymore, hallelujah), help hydrate and restore moisture to dry and sensitive skin or sun damaged skin and is basically just everything we all need in a bottle!

Jojoba Oil – I just find this so fun to say but also makes me so happy when I put it on my skin. It’s quite a light oil and mimics the oil our skin naturally produces called sebum, to stop our skin from producing anymore and therefore causing less acne due to less oil being clogged up. It’s amazing as a moisturizer but can also be used on your lips, as a makeup remover or a cleanser. Only two drops moisturized into the face can definitely help you to wake up with clearer, healthier and happier skin!

Superdrug’s Naturally Radiant range is definitely my new favourite, and their facial oil is “Enriched with a blend of natural oils – Rosehip, Jojoba Seed, Olive Fruit, Grapeseed and Apricot Kernel Oil to help soothe, moisturise and soften the skin”  as well as Kiwi and Mulberry extracts which brighten up the skin giving you that glow from within. And the best part? It’s only £7.99 and trust me, it’s amazing! I don’t know how I did my skincare routine without it and the price for such amazing ingredients feels like a dream. This is definitely one of my holy grail products and I’ll be writing about the range soon!

Tip #8: Glycolic Peels and Face Masks

We all love to treat our skin and pamper ourselves but who actually has the time apart from every now and then? I’d heard about chemical peels in the past used by beauty influencers who had perfect skin and although it sounds daunting, I was so intrigued. I also don’t have the money to go to a specialist for one so when i realised that peels were available at drugstores, i couldn’t help but instantly pick one up!

The one I currently use is the Superdrug’s Naturally Radiant Glycolic Overnight Peel which is perfect as it’s like getting a facial whilst you’re asleep! It is said to contain a “unique energizing complex infused with Kiwi Fruit and Mulberry Extracts to help revive skin’s radiance and even out skin tone” as well as Glycolic Acid, a powerful Alpha Hydroxy (AHA) and a Fruit Acid blend which brightens and retexturises your skin. I’ve been using this for around 6 weeks and each time I wash it off in the morning, I’m still amazed by the results. My fine lines such as my laughter lines are now barely visible, my skin looks brighter as soon as I wash it off and my skin is so much smoother.

Face masks which contain vitamins are also amazing at helping to give your skin the boost and love it needs whether it’s face masks you wash off after ten minutes, deep cleansing masks, overnight melt-in masks or peels. I use a variety and it really does make a difference!

Tip #9: Drink plenty of water

Staying hydrated is key for both our insides and our skin on the outside. Dehydration can lead to break outs, your skin looking duller, your pores looking more obvious as well as headaches so keeping hydrated and looking after your insides can also help how your skin looks on the outside. I try to drink a glass of water with and in between each meal whilst cutting out the fizzy drinks (even though they’re so nice) and now I can’t go without at least two bottles of water a day. Your skin will thank you, trust me!

Tip #10: Love the skin you’re in

Acne and blemishes can really bring us down and make you not to want to look at yourself on the mirror sometimes but it’s important to remember that your acne doesn’t define you, try to love your skin and yourself and remember that you are all gorgeous inside and out ♥

I know that this was quite a lengthy post but thank you for reading and I really hope this has helped! Feel free to ask any questions and comment below or let me know on Twitter what your favourite skincare routine and products are 🙂

See you here soon,

Zahra xxx


Review: AA Skincare’s Plant Inspired Natural Shampoo

Hey lovelies! It’s definitely been a while and I miss you guys, and although I am on a short hiatus until after my exams have finished (exactly 2 weeks from today!), I wanted to let you beauties know about the new, natural shampoos I’ve been trying out for the past couple of weeks from AA Skincare.

I have loved this brand for quite a while now when I first fell in love with their face masks at the end of last year. I love how how their products are all natural and suited to anybody of any age with any skin type and hair type. When I was kindly sent the Pomegranate and Rose Shampoo, I was so excited to try it as I have a very irritable scalp and have to be very fussy when it comes to finding shampoos without harsh ingredients in them however all of the AA Skincare products are free of parabens and harsh chemicals (hallelujah!).

You can read about the shampoos here and purchase them as well as their other products here.

IMG_2504
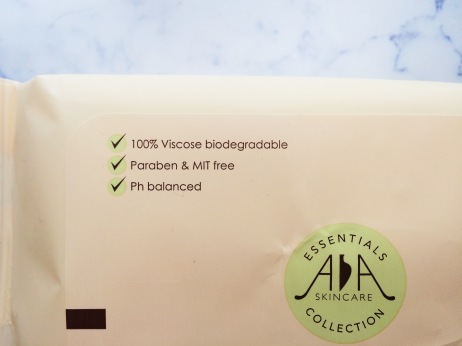
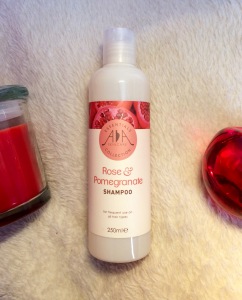
The Pomegranate and Rose Shampoo is one of six from their new plant inspired natural shampoos and conditioners range which all retail at £5.94 each for a 250ml bottle. All of the bottles have such lovely packaging suited to the shampoo which i adore and the bottles are sturdy (i’m definitely so clumsy when it comes to dropping things).

The shampoo i’ve been using is “An ultra-gentle natural shampoo delicate enough for everyday use” which is perfect as my hair tends to get greasy after a day which is so annoying and has definitely led to me buying many bottles of dry shampoo to avoid drying my hair out by over-shampooing.

My hair has been quite dull and in need of some love lately however after using this, my hair was super soft, smooth and bouncy after blow drying it! I love how my scalp felt cool and not irritated in the slightest, it definitely was a pleasant change and shows just how gentle and natural these shampoos are. The product itself does not lather a lot so if you’re like me and don’t like a lot of lather, this is right up your alley. It is a clear, quite thin product however because it doesn’t lather, I ended up feeling like I needed more than i actually did so definitely don’t use too much with this as i couldn’t wash it all out. Expectedly, the product has quite a strong smell of roses whilst you’re using this shampoo – it smells exactly like my rose water toner and wasn’t as strong once i’d washed it out.

Overall, I am happy with how this makes my scalp and hair feel when using it and although I did expect my hair to look shinier, it did make my hair feel super soft and definitely did what it claims to which is to “soothe, soften and hydrate the skin” with Rose Otto as well as “repair damaged hair and promote hair growth” with geranium and regenerate the hair with aloe vera. I will have to use this product for a couple of more weeks before I can say if this has lead to my hair being longer and healthier but I would love to hear what you guys think of all natural shampoos and if you have tried any of these!

I will see you guys soon with a post i’ve been working on for quite a while so don’t forget to subscribe to be notified when it goes up and I hope you’re all enjoying your spring break!

Much love,

Zahra xxx

♥ My March Favourites! ♥

Hey dolls! Spring is finally here! (As well as my first proper blog post finally, woo). March has been an exciting month which has seen the birth of this blog as well as discovering so many (trust me, there are quite a few listed no matter what you’re looking for!) products which will last me through both winter and spring and since my allergies can be such a nuisance, this is essential as well as finding products which don’t break the bank. No matter what the weather, my combination skin can either hate or fall in love with products leading to me breaking out or glowing however despite being skeptical about trying new products from drugstore to high end, I’ve found makeup products and skin care essentials which have worked wonders for me and I’ve been desperate to share them with you all. I’ve also found the best prices for you all so you can save a few £££ so read on to find out where you can get these must-haves from for the cheapest price on the market, and now that I’ve blabbed on enough, let’s just get right into it (it’s going to be quite a long post)…

P.S. Since this post was getting waaay too long, I have cut some stuff out and will be posting more detailed blog posts on them very soon so keep a look out and don’t forget to subscribe! x

Base:

Favourite Primers

Nivea Men Sensitive Post Shave Balm – £2.50 (Originally £5, half price until 11/4/2016)

Okay, I know it might feel a bit weird taking a men’s after shave balm product to the till but for £3, I couldn’t help but try this out as a primer. My friends were giving me weird looks for even mentioning it but when I heard Nikkie Tutorials say this was a must have, I did not doubt her. This product does what any primer should do and keeps my makeup on perfectly for around 8 hours due to the high levels of glycerin in it (which acts like a glue). It has a distinguishable manly scent from when you open it but by the time you get to applying your foundation, the smell has completely gone, so don’t worry you won’t be smelling like a man all day. The product itself is quite runny and white in colour which becomes translucent when applied to the skin, so i try not to pour too much out when using this as you won’t need much and it contains quite a lot of product in the tub so it will last you a while. When we’ve had the longest day, with my friends looking at us in the elevator mirror and my make ups still in place with one of them asking “you have the shave balm on don’t you?”, I knew this was a good find. And for only £3, why not try it out?

L’oréal Infallible Mattifying Base Primer – £7.99

This primer does exactly what it says and gives you the perfect mattifying base for your foundation, however it didn’t keep me matte all day. Now for a girl who loves a glow, I wasn’t too fussed but my skin has become more oily in my t-zone areas lately and I noticed that this primer didn’t keep me matte where I’d like it to. That being said, it does exactly what it says it does: “Prepares and smoothes skin by minimising imperfections, pores and shine, gives a mattifying effect, instantly transforms skins texture for an even surface with velvet-soft touch and foundation glides seamlessly across it.” I really do love the base that this gives me for my foundation and how soft it makes my face feel with the application of my makeup going on so smoothly that with my satin finish foundation I really did have a smooth glowing face (quoted by my friends who couldn’t stop staring at my makeup and the only different thing i’d used that day was this primer). Just to be sure it was the primer, I tried it again the next day and instantly noticed the smooth base it gives my face straight away. It kept my makeup on for maybe an hour longer than the Nivea Shave Balm and isn’t the most pricey primer either. The product is a translucent gel which for me was quite difficult to work with at first using the technique recommended of applying dots onto my face and then rubbing it in considering i’m not a fan of gel formulas however it’s become quite quick to use if i squeeze quite a bit onto my fingertips on both hands and then massage it outwards into my skin. If you try this one out, let me know if you like it!

Makeup:

My Favourite Foundation

Maybelline Dream Satin Liquid – £6.98

For all my sensitive skin, acne prone beauties out there, this is for you! I have fallen head over heels for this foundation because HALLELUJAH not only does it it match my skin perfectly and actually blend to look like my skin, it is also oil-free, fragrance-free, dermatologist-tested, allergy-tested and non-comedogenic! With it being oil free, i can put this where I usually get acne due to oil clogging  up my pores and not worry about this foundation making it worse. Ever since I broke out worse than ever, finding non-comedogenic products i loved to use whilst treating my acne was a tough one as well as finding one to  match my olive-toned skin. I am guilty of using foundations which have made it look like I’m wearing a mask too light for my face no matter how much I blend onto my neck so I wanted to find a light/medium coverage foundation. I didn’t actually mean to buy this product since I was looking for another Maybelline foundation to try but since it was there I grabbed it and I am so glad I did.

It is a lightweight, lovely smelling foundation and with one layer I can’t even feel it on my face. The coverage is light to medium but enough to cover any marks and pores which I find amazing. If I want higher coverage on any acne scars or my pores, this is definitely buildable and unlike with others I’ve tried, building this up only makes it look better for me! The finish is a satin dewy poreless finish which I love especially when the suns out so I can feel like I’m glowing (although sun in England is rare), I just make sure to set any oily areas with powder as it can budge around my nose however with a primer this foundation stays perfect for me for at least 8 hours. I wouldn’t recommend this for my oily girls out there however for anyone that wants that glow from within without breaking the bank, I’d definitely try this out. I’ll also be picking up another bottle when I can especially since it’s so affordable 🙂

My Favourite Mascaras (I’ve listed a few depending on whether you want a natural lash look or full on falsies effect  however i’ll be making a more detailed post on them with many more favourites and photos soon)

Seventeen Doll’d Up Mascara gives you curled, non clumped doll like lashes. You can add more coats whether you want a complete natural look or a full on doll look- £6.29

No7 Extreme Length Mascara gives you the long long long eyelashes we all dream of having! Wearing it alone gives beautiful results as well applying a coat on top of another mascara just to add that extra length as it makes all the difference, im hooked! – £12.50

L’oréal Volume Million Lashes So Couture and Volume Million Lashes Excess – £9.99 each. I cannot live without these babies, these were the first mascaras i ever used since they were my mums holy grail and i see why! So Couture gives you the perfect curled lashes and Excess literally does make it look like you have a million lashes! These are a must-have for me, even when empty I use the wand to de-clump my lashes and separate them all for that perfect finish.

Makeup Revolution Ultra Cream Contour Palette – £8

c

This is my first cream contour i have ever tried since i was so used to powder however for only £8 i knew i had to step over to the other side. In the palette, you get 8 different shades which can be used on different skin tones – that’s only £1 for each! I became obsessed with the banana shade and hit the pan on it first which lead to me investing in a banana powder (i highly recommend the NYX one i just bought, it’s amazing) to stop me from overusing the cream. They can be a little stiff at first as can many creams however once you swirl your brush around, you can get more than enough product. It also comes with a nice wide mirror so you can use this on the go.

The contour shades range from very light to a darker bronzey shade. I like to use the lightest to contour my nose as it creates a shadow look rather than a warmed up look and the darkest underneath my cheekbones before applying powder. The highlighting shades range from a pinky shade to a olive concealer shade, however I have been able to use them all just by playing around and mixing them so you can definitely get your moneys worth. The glitter highlighter is also a cream and gives a lovely shimmer to the skin however it can appear quite white, it all depends on how much you use, how you apply it and how much you blend. Overall, i am very pleased with this palette and so glad i purchased it.

Sleek Face Form Palette – £10

My love affair with Sleek started a few years ago with this baby. This palette is still (only just) going strong after over two years now. My highlighter has pretty much gone (💔), my bronzer has just hit the pan and I don’t really use the blush often since it’s too glittery and light pink for me (the fair shade comes with a blush, the medium and dark come with a shimmery bronzer). But the bronzer and highlight shades are definitely my favourites ever since I first got into makeup.

I’ll start with the highlighter – it’s a white shimmery highlighter with a pink undertone however once on the skin it appears as the perfect natural light-catching glow instead of just glitter.

h

I’ve yet to find a highlighter which gives me that perfect natural highlight for an every day wear however if any of you have any drugstore highlights you love, please let me know
since I really need a new one, I can’t scrape at the edges of the pan forever (sadly).

The contour shade is perfect for creating that shadow under the cheekbones and jawline making the chiselled look so easy to create when I’m rushing around in the morning but also a lovely colour for warming up the forehead and perimeters of my face. Since I don’t use the blush as much, I’m thinking of purchasing the contour kit next time instead of the face form kit on my next trip into town for my two favourite products in one palette.

Makeup Revolution Blush in Treat – £1

This was the first product I ever purchased from MUR and it was back when they were just first coming about as a brand, so everything was fully stocked up and in true MUR style, very cheap and affordable. Of course, i didn’t expect much out of a smaller, cheaper brand but finding the perfect shade of blush that i’d been searching for everywhere for only £1 felt like a dream. I regret abandoning this for a while because it really is my dream shade. It is a lovely peachy-pink shade called Treat and my packaging of course looks different to how it looks now on the site, i haven’t seen it in stores but i’m guessing it is the same one. One swirl of a blush  brush picks enough product for me for a natural look however i like to build this up if i’m going out and is the perfect natural shade to not make me look like a clown. And come on, £1 for a blush?! I’ll definitely be stocking up

Kiko Smart Lip Liners – £2.50 

When I heard these were only £1.20 for the time being, I couldn’t help but buy almost every shade along with my friends however I’m glad I got quite a few because i can definitely use these everyday. They’re matte yet super creamy so don’t dry your lips out, have a good staying power and you can use them all over your lips instead of just lining them if you wish as the liners are pigmented and have a high coverage. I tend to use them all over my lips, and sometimes apply one colour on top of another to get my dream shade. You can sharpen these with a cosmetics sharpener however be gentle as they can be quite soft due to their creamy formula. My favourite has to be 704 which is the brick red shade – I didn’t think it’d suit me but now i just wish i’d ordered another since it’s a minimum spend of £25 to order online, please change that Kiko!

Skincare:

Simple Kind To Skin Deep Cleansing Face Mask – £2.65

For anyone who loves a quick pamper here and there whilst wanting clean, fresh skin, this ones for you! I love face masks but finding the time to use them means that they end up going off before I’ve used all of it up. I’ve always wanted a face mask that will get rid of the dirt in my face deep down so my pores won’t clog up and i’ll end up with clearer skin, and this face mask is everything I’ve been looking for! You leave it on for 3 minutes on dry skin, let it work its magic and then wash it off with water and ta da – your skin will feel smoother than a baby’s freshly moisturized skin before you’ve even put any moisturiser on your face as well as leaving it feeling so clean. I definitely recommend this one, i find that when i apply it to my face it thins out quite a bit but less is more. I’ve used this around 4 times now and i still have quite a bit left. For oily skin, only use it once a week and for dry and combination, twice a week. Pair this with my favourite moisturiser – the Simple Kind To Skin Hydrating Moisturiser and you’ve got yourself a win. I love that the products contain vitamins which are amazing for your skin and no harsh fragrances or chemicals. Trust me team, this is definitely one you want to try!

Clean and Clear Spot Gel – £3.94

I just had to throw this one in as it is nothing short of a miracle worker for my spots. My mum had one brewing on her face, put this on at night and by morning it had completely vanished. On tougher spots, after applying this for a few days they had completely dried up and gone and i could definitely see the shrink in size after using this for the first time. It cleared up most of the spots on my forehead and hopefully it continues to work for me, let me know which other spot treatments you like!

So if you’ve made it to the end of this post, you’re definitely one of my favourites since i know this was quite a lengthy first blog post. I hope you try out some of the products and make sure to let me know if you do! What were some of your March favourites? Make sure to let me know in the comments and i hope you all have an amazing April!

See you soon,

Zahra xxx